
![]()
Thellungiella halophila
transformation handbook
with special emphasis on large-scale operation
The spray method
(click on links below to move thru the document)
Seed handling and germination
Plant growth and transformation
Agrobacterium
preparation
Post transformation plant care
Identification of T0 plants based on
herbicide resistance gene expression
Pests of Thellungiella halophila
APPENDIX
Center for Plant Environmental Stress Physiology
1165 Horticulture Building
Purdue University
West Lafayette, Indiana 47907-1165
April 2005
Seeds of Thelungiella halophila are best stored when dried to a moisture content of 5 to 6%. This can be achieved by air-drying for about 4 weeks or drying in desiccators with drierite or silica gel for 3 or 4 days. Store seeds at room temperature in 30 ml scintillation vials inside glass desiccators or chamber desiccators. Small amounts of seeds can be stored in small coin envelopes (Figs. 1 and 2).
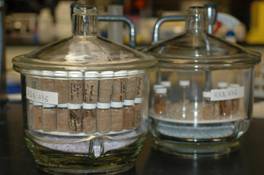
Fig. 1 Fig. 2
When sowing on soil, use a loose potting type soil mix, such as Promix BX (available through Hummert – www.hummert.com) or MetroMix 300 (manufactured by SunGrow – www.sungrow.com). Typically, we use 25 x 25 x 5 cm seed bed trays (10 x 10 x 2 inches). Consider sowing approximately 10 mg of seed per tray. Because seeds are minuscule, to facilitate uniform dispersion we mix the seed with fine sand in salt/pepper shaker, 1 part of seed to 4 parts of sand by volume. Thoroughly water the soil-filled trays.
Since high density plantlets are more susceptible to fungi (Pithium spp. in particular), it is important to treat the soil preventatively with a fungicide solution. We use Terramaster (Uniroyal Chemical, Middlebury, CT), 1 teaspoon/gallon of water for 5 flats, applying with a watering can. After this treatment, proceed to sowing (Fig. 3). Seeds are to remain on the surface. Do not cover them with soil.
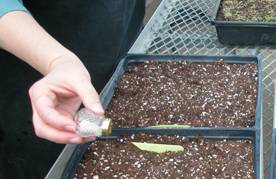
Fig. 3
After sowing, place planters at 4 °C (39° F) in dark cold room for 10-14 days to allow seed stratification (Fig. 4).


Fig. 4 Fig. 5
Transfer seed trays from the dark cold room under mist (8 seconds of mist every 10 minutes) in warm light conditions for one to two weeks (Fig. 5). Germination temperatures are typically: 23 °C (73 °F) in daytime, 18.5 °C (65.5 °F) at nighttime. For mild weather condition, adjust accordingly. Move the planters to the greenhouse and grow under 16 hrs photoperiod. In our condition (Northern hemisphere, 40th parallel) we provide additional light with 400 Watt metal halide lamps (75-100 μmol/m2/sec), from 5 a.m. to 9 a.m. and from 5 p.m. to 9 p.m. each day, starting on autumn equinox until the spring equinox. Growing temperatures are: 18 °C (64.5 °F) daytime and 16.7 °C (62 °F) nighttime. Water plants regularly and thoroughly from above, with a gentle shower. To reduce fungal growth and infestation of fungus gnats (Sciarids), allow containers to drain well and let the soil surface dry between watering.
Plant growth and transformation
When plants are about 2.5 cm (1 inch) in diameter (leaf tip to leaf tip), a vernalization period is required to promote flowering. Water very well and then move the planters back to the cold room at 4 °C (39 °F) for 21 to 28 days, with a 16 hour photoperiod. During this low temperature period, plants generally require little watering and may be covered with propagation domes to avoid dehydration. Vernalization can be performed anytime after germination, but as plants age, longer vernalization times are required.
After vernalization, transfer plants to the greenhouse and immediately transplant them to larger containers, such as plastic tubs 90 x 60 x 20 cm (36 x 24 x 8 inches), containing a fine-textured soil mix, to within 2.5 cm (1 inch) of the rim. Before filling the tub with soil, we drill several small holes in its bottom, to ensure good drainage. Also, we drill three evenly-distanced holes on one of the long side of the tub, in order to accommodate PVC tubes of 4 cm (1.8 inches) diameter, slightly longer than the short tub length (Fig. 6). Such tubes are then secured to the inside wall of the opposite side of the tub by sealing with siliconized acrylic latex caulk, commonly available at hardware stores. The PVC tubes have been previously drilled with several fine holes. This will allow water movement later on, when the tubs will be set vertically on their long side during maturation of the seed, which occurs gradually. During this time, plants might still require watering, which can be done through the PVC tubes.
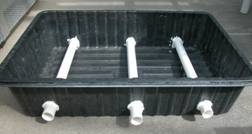
Fig. 6
After vernalization, plant seedlings in rows about 5 cm (2 inches) apart (Fig. 7). Cover with cheesecloth for about 5 days to minimize transplant shock (Fig. 8). If days are very sunny, make sure plantlets are well watered and shaded. It is convenient to water through the cheesecloth. Continue to water with fertilizer solution.
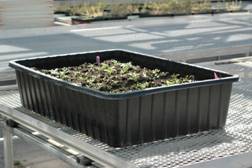
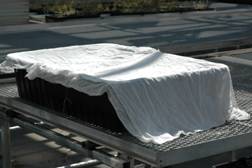
Fig. 7 Fig. 8
When flower buds develop and bloom stalks are about 5 cm (2 inches) tall, begin spraying with Agrobacterium at 7 day intervals (Fig. 9). Instructions for Agrobacterium culture and preparation are given in the following section. Cover tubs with polyethylene sheeting for 24 hours after spraying to keep spraying solution from drying too quickly (Fig. 10). This might create overheating in hot weather, so make sure the temperature is kept low and provide some extra shading. Specialized protective sheeting might be necessary to reflect solar energy during hot season. (high performance material can be purchased through AB Ludvig Svensson, Kinna, Sweden – <http://www.ludvigsvensoon.com/>) Suspend the sheeting above the plantlets with bamboo stakes or similar cross supports, so flower stalks are not weighed down (Fig. 11). Continue spraying until after secondary flower stalks develop and flower buds open (Figs. 12, 13 and 14). This means at least 8-10 Agrobacterium treatments, more if plants remain healthy.
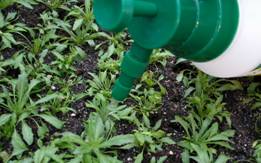
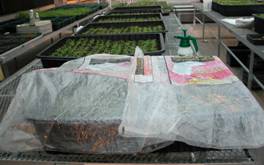
Fig. 9 Fig. 10
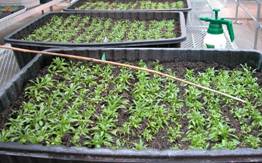
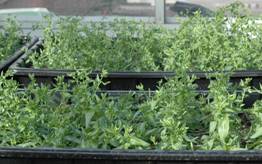
Fig. 11 Fig. 12
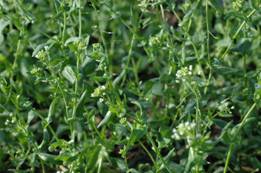
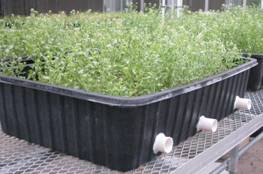
Fig. 13 Fig. 14
Select an appropriate vector for your purpose. Below we describe the use of pSKI15 for mutagenesis, starting from a frozen glycerol stock of Agrobacterium tumefaciens (GV3101 (pMP90RK) (C58 derivative), pSKI15, Hayashi et al., 1992) from -80 °C. The Agrobacterium strain GV3101 contains a binary vector (pSKI15) for activation T-DNA insertional mutagenesis (Fig. 15). The pSKI15 plasmid contains 4 transcriptional enhancers derived from the cauliflower mosaic virus (CaMV) 35S RNA promoter cloned in tandem near the right border sequence and an expression cassette for herbicide resistance (bar gene encodes phosphinothricin acetyltransferase). Agrobacterium selectable markers are:
- resistance to ampicillin/Ticar/ carbenecillin (pSKI15)
- resistance to gentamicin (Ti plasmid)
- resistance to kanamycin (Ti plasmid)
- resistance to rifampicin (GV3101)
The T-DNA also contains a bacterial origin of replication (oriC) for plasmid rescue in Escherichia coli.
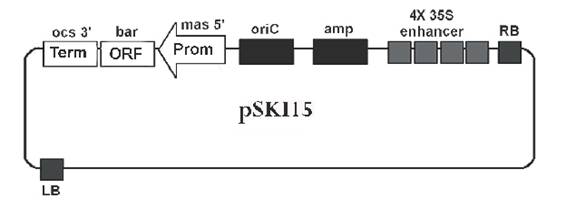 Fig.15
To culture Agrobacterium for spraying plants, pieces of frozen culture are chipped off using a 200 μl pipette tip from the -80 oC Agrobacterium stock and inoculated into 5 ml YEP medium plus appropriate antibiotics in culture tubes (25 x 150 mm). Inoculate several tubes and incubate on a shaker in the dark at 28 oC for 24 hrs at 230 rpm. The medium should look saturated (cloudy, OD600 >1.5 to 2.0). Add 3 ml of culture to 500 ml of medium (YEP + antibiotics) in 2L flasks. Incubate on a shaker in the dark at 28 °C at 230 rpm to an OD600 of >1.5 to 2.0 (16 to 18 hr). Centrifuge the culture to form a pellet (4500 rpm for 20 minutes). Decant the supernatant and add about 200 ml of Agrobacterium infiltration medium (see Appendix) into the bottle. Re-suspend pellet well by vigorous shaking and dilute the suspension with infiltration medium to 1L final volume (final OD600 of 0.8).
Post transformation plant care
Water plants regularly, not allowing soil to dry completely until all flowering is finished and siliques begin to ripen. Gradually decrease watering when plants are deemed and begin senescing. At this stage, turn tubs on their side over large sheets of brown paper to catch ripening seed while siliques continue to ripen (Fig. 16). When plants have dried, cut off flower stalks (Fig. 17) and collect the seed. Harvest seed about 2 to 3 weeks after termination of watering. Thresh seed by hand rolling with a wooden rod and pass them through sieves and tea strainers (Figs. 18 and 19). Several passages through different size
sieves might be necessary to clean seed from all siliques residues and chuff. Once clean, store seeds into scintillation vials.
Fig. 16 Fig. 17
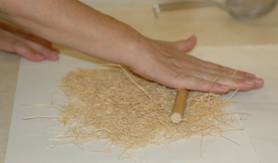
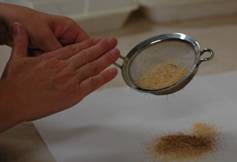
Fig. 18 Fig. 19
Identification of T0 plants based on herbicide resistance gene expression
Prepare to sow 1g of seed (~ 50,000 seeds) in greenhouse full flats (53 x 27 x 5 cm; 21x 10.5 x 2 inches) with loose soil previously well watered and treated with fungicide (see Seed handling and germination section). Typically, we suspend 20g of seed in 80 ml of water in a clear-glass, large-mouth bottle, and shake well and repeatedly for 15 min. After letting stand such preparation for a few minutes, empty seed shells, chaff and other plant residues will float to the surface and can be separated by decanting (Fig. 20). The volume is then adjusted to 100 ml to facilitate subsequent phase. The bottles are placed on rotation at 4 °C (39 °F) in the dark for 2 weeks. For sowing, 5 ml aliquots of the seed suspension are transferred into laboratory spraying bottles, water is added up to 150-200 ml and the content is squeezed on a full flats, following a regular zigzag pattern in all directions. This method is more convenient when dealing with large quantities of seed in large-scale operation, since there is no need for laborious transferring of trays to a cold room: once sowed, the trays are immediately placed under the mist. A further advantage seems to be a more regular germination.
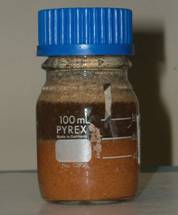
Fig. 20
Alternatively, use sand and disperse the seed using salt/pepper shaker method. Proceed as previously described for stratification and germination under mist.
Begin spraying the seedlings with the herbicide immediately after removal from mist (plantlets should have only cotyledons or first pair of true leaves). For herbicide application, use a final concentration of 50mg/L of active ingredient. For Finale “Ready-to-use”, dilute 4.4 ml in 10 liters of tap water (starting from an original concentration of 11.3% in the commercial product). 1 Liter is sufficient for about 5 full flats. Keep the preparation in the dark, to avoid herbicide degradation.
Spray for 5 consecutive days each week until you notice plants surviving. Uneven germination in T. halophila requires repeated herbicide treatments. Mark survivor plants from first germination with toothpicks, while secondary germination is starting (Figs. 21 and 22). Transplant putative transformants to 25 x 25 x 5 cm (10 x 10 x 2 inch) trays, 25 plants/ tray (Fig. 23). Protect from transplant shock as described previously, using cheesecloth shading.
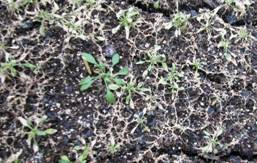
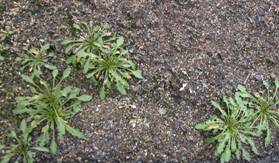
Fig. 21 Fig. 22
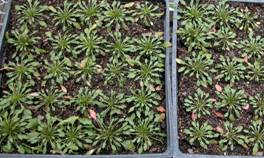
Fig. 23
Once plants are established, vernalize at 4 °C (follow vernalization procedures). Seeds collected from each tray are pooled for further study.
Pests of Thellungiella halophila
It is good practice to monitor for pest in the greenhouse, since optimal conditions for growing plants suit insects and fungi as well. Having many plants of the same species in a controlled environment, in the absence of natural antagonists, is a risky enterprise. Once a problem arises and becomes fully noticeable, it might be already too late. Alternate products to reduce insurgence of resistance in pest population.
Powdery mildew (Oidium spp.) – Plants look dusted and covered by a fine white powder. Treat with sulfur spray, following manufacturer instruction.
Thrips – generally not as lethal as on Arabidopsis, still require care and spraying with insecticides approved for thrips.
Aphids –preventative treatments are more effective than treatment of the infestation.
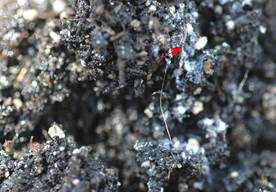
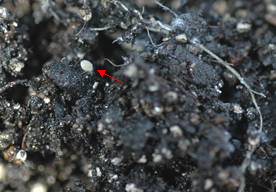
Root aphids – they first appear on roots, and the first above-ground symptom is leaf yellowing. Loosening the plant from the soil, its roots and the surrounding soil will appear infested a white mycelium-like felt, in which the aphids nest. While not lethal, root aphids can cut seed yield dramatically and halt maturation of the plants. Treat the plants after transplanting to avoid infestation, with 2 ml/gallon of Marathon, using a sprinkling can. Apply until solution runs through.
Bacterial Growth Media
Yeast Extract Peptone (YEP)
Medium – per liter
Yeast Extract 10 grams (g)
Peptone 10 g
NaCl 5 g
Adjust pH to 7.0 0.1 with 0.1N
Potassium Hydroxide (KOH)
Autoclave sterilize, typically
for 20 minutes at 121 °C (steam at 15 p.s.i.)
Note: Antibiotics and other heat
labile substances are added after medium is cooled to 55 °C in water bath.
YEP + antibiotics – per liter
Kanamycin – 50 mg
Rifampicin – 30mg
Gentamicin – 30 mg
Ticarcillin – 30 mg
Agrobacterium
infiltration Medium – per liter
MS salt (1/2X) – 2.2 g
B5 vitamins (1X)
Sucrose – 50 g
MES – 0.5 g
N6-benzylaminopurine (BA) – 0.01 mg
Silwet L-77 – 200 μl
pH 5.7
Stock Solutions
B5 Vitamin/Amino Acid Stock (1000X – per 100ml)
i-(or myo-)inositol – 10 g
Thiamine-HCl – 1 g
Nicotinic acid – 0.1 g
Pyridoxine-HCl – 0.1 g
Rifampicin, Kanamycin, Gentamicin, and Ticarcillin antibiotic stocks: these compounds are heat labile and cannot be autoclave sterilized.
Kanamycin (30 mg/ml) – 300 mg
Ticarcillin (100 mg/ml) – 1.0 g
Gentamicin (30 mg/ml) – 300 mg
Prepare each of these antibiotic stocks separately, dissolving each compound in 10 ml of H2O.
Rifampicin (30 mg/ml) – 300 mg
Dissolve in 10 ml of methanol
Filter sterilize using a syringe
and a 0.22 μm membrane filter. Aliquot into 1ml samples and store up to 3 months
at -20 oC.